
COMING SOON !
ADVANCED TUTORIALS

You can find clothing layer folder in the Aesthetic package
You can find this kit in the Aesthetic package and it's also available to pick at Niramyth main store
You can find this kit in the Aesthetic package and it's also available to pick at Niramyth main store
You can find a personal use kit in the Aesthetic and add-on packages. If you want a kit for commercial use, you are required to submit an online application
This kit requires to submit an online application
This kit requires to submit an online application
You can purchase this kit at OMEGA store.
IMPORTANT:
Please make sure "Hardware Skinning" has turned on. This is a MUST for mesh bodies!
If you turned it off, you would see black things cover your body.
How to turn on Hardware Skinning
> Go to Preference
> Graphics
> Enable ✔ Hardware Skinning below the Avatar Rendering
> Click Apply and OK.
Please do NOT use "LOW" graphic setting !

(NIRAMYTH) - AESTHETIC - Clothing Layer
This folder contains clothing layers with basic tank and jeans textures and come in various sizes to choose to wear:
4 Tops; Compression, Fitted, Loose, and Oversized
4 Bottoms; Skinny, Slim, Straight, and Baggy
1 Bodysuit
These clothing layers are designed to work with Aesthetic and Omega applier system. You can find other clothing appliers made for Aesthetic by the 3rd party developers on Developer List page or on Marketplace.
If you want to make your own clothing appliers for personal use or for sale, please see Developer Kit / Clothing Layer
The clothing layers are already set as Alpha Masking mode, so when you create clothing texture, its format should be PNG or TGA 32 bit with alpha channel.
What is Alpha Mode?
- None: is for non-alpha textures.
- Alpha Blending: is good for showing gradient for color values. It is good for tattoo or the clothing that have transparent parts on it.
- Alpha Masking: is better as clothing layers because it will not interrupt with the tattoo layers under it while the mode "Alpha Blending" will not always show your tattoo layers under it. (This well known bug in SL is called "Alpha Sorting Issue")
- Emissive mask: We don't use this.


(NIRAMYTH) - AESTHETIC - Developer Kit / Clothing Layer Applier
Introduction
This Clothing Layer Developer Kit is for anyone who wants to make their own clothing appliers for personal use, or for any designers who want to make clothing appliers for sale in store. The clothing applier is for applying textures onto Aesthetic clothing layers. You can make two separate appliers; one for top and another one for bottom, or make a single applier for applying to both top and bottom in a time.
Clothing layers (tops, bottoms, bodysuit) are in another folder named AESTHETIC - Clothing Layer. You must wear clothing layer before using applier HUD to apply clothing texture.
This developer kit requires basic knowledges of textures making, modifying and scripting skills.
Please read TERMS OF USE carefully before you use the developer kits.
Contents in this folder
1) Scripts (Full Permissions)
1.1) Simple Clothing Applier Script (main script)
This is a main script that sends UUIDs of your textures to clothing layers. Before setting your item for sale, you must change this script's permissions to "NO-MODIFY, NO-TRANSFER" to protect your UUIDs, otherwise, your texture UUIDs might possibly be stolen.
1.2) About Button Script (optional)
This script is for making an ABOUT button on Applier HUD to show your store or product information. You have to change the information in the script before putting it into HUD.
1.3) Default Button Script (optional)
This script is for sending the blank (plain white) texture to the clothing layers in order to reset/clear the textures on the clothing layers to plain white object.
2) Sample Applier HUDs
These are just the sample applier HUDs that we made as a guide only. You can try using them to change the basic starter outfit textures on the clothing layers. These sample Applier HUDs are not trasferable because we want to encourage you to create your own HUD object so that the creator of the HUD will be your name.
3) Clothing Layer HUD interface
This is a sample HUD template we gave you as a guide. You may use and edit it, add your product image, or you can design your own HUD interface.
4) UV template texture for Upperbody and Lowerbody
Save these Upperbody and Lowerbody UV templates into your computer and use them as a guideline layer to make clothing textures.
These clothing UV templates are quite similar to SL-UV clothing templates, so you may use SL-UV clothing textures to make clothing appliers for Aesthetic.
5) AESTHETIC Compatible tag texture
Put this tag on your product image or ad to say that it is compatible with Aesthetic body.
How to create Clothing Applier HUD
1) Upload your clothing texture into Second Life with alpha channel in TGA format / 32 bit or PNG. Right click at your texture and choose "Copy Asset UUID".
2) Open the Simple Clothing Applier script and paste your texture UUID in the Upperbody or Lowerbody command lines.
(You can refer the body part names from Upperbody and Lowerbody UV templates)
Example #1: Assume if UUID of your tank texture is xxxxxxxx-xxxx-xxxx-xxxx-xxxxxxxxxxxx. Put the UUID at upperbody behind the torso command and delete other unused body parts command lines as following;
llSay(channel, "torso_cl|xxxxxxxx-xxxx-xxxx-xxxx-xxxxxxxxxxxx");
Example #2: Assume if UUID of your long sleeve t-shirt texture is xxxxxxxx-xxxx-xxxx-xxxx-xxxxxxxxxxxx. Put the UUID at upperbody behind the torso, left shoulder, right shoulder, left forearm, right forearm, left wrist, right wrist commands, and delete other unused body parts command lines as following;
llSay(channel, "torso_cl|xxxxxxxx-xxxx-xxxx-xxxx-xxxxxxxxxxxx");
llSay(channel, "lshoulder_cl|xxxxxxxx-xxxx-xxxx-xxxx-xxxxxxxxxxxx");
llSay(channel, "rshoulder_cl|xxxxxxxx-xxxx-xxxx-xxxx-xxxxxxxxxxxx");
llSay(channel, "lforearm_cl|xxxxxxxx-xxxx-xxxx-xxxx-xxxxxxxxxxxx");
llSay(channel, "rforearm_cl|xxxxxxxx-xxxx-xxxx-xxxx-xxxxxxxxxxxx");
llSay(channel, "lwrist_cl|xxxxxxxx-xxxx-xxxx-xxxx-xxxxxxxxxxxx");
llSay(channel, "rwrist_cl|xxxxxxxx-xxxx-xxxx-xxxx-xxxxxxxxxxxx");
You may read the instructions inside the Simple Clothing Applier script for more details.
After done putting UUID, do not forget to set the script permission to "NO-MODIFY, NO-TRANSFER" and click save.
3) Build a prim object for making HUD and drag the modified Simple Clothing Applier script into the root prim of your HUD.
4) Test it by clicking at your HUD to send the texture to the clothing layer. Make sure you wear the clothing layer, otherwise nothing will happen. (Clothing layers are in AESTHETIC - Clothing Layer folder)
5) If it works fine, set the permission of the HUD to "NO-MODIFY, NO-TRANSFER". (This is to protect your own texture UUIDs)
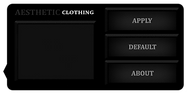
6) You can make "DEFAULT" and "ABOUT" buttons using the default and about scripts provided in the developer kit.
7) You can either design your own HUD interface if you want, or use the Clothing Layer HUD interface texture provided in the developer kit.
8) Now you are ready to sell your Clothing Applier HUD. However, to make sure people know that it works only with Aesthetic body, you need to put the AESTHETIC Compatible tag in your product images/ads and put a keyword "Niramyth Aesthetic" on Marketplace, so people can search for your product.


(NIRAMYTH) - AESTHETIC - Developer Kit / Tattoo Applier
Introduction
This Tattoo Developer Kit is for anyone who wants to make their own tattoo appliers for personal use or any designers who want to make tattoo appliers for sale in store. The tattoo applier is for apply tattoo texture onto Aesthetic body.
You CANNOT use SL-UV tattoo textures on Aesthetic body because SL has a different UV template than Aesthetic UV template or as so called "HD-UV template"
This developer kit requires basic knowledges of textures making, modifying and scripting skills.
Please read TERMS OF USE carefully before you use the developer kits.
What is HD-UV template ?
It is a custom UV template for specifically using with AESTHETIC Advanced Mesh Body. It allows us to make bigger size textures for full body up to 5 times more resolution than SL-UV template. You will see more details of your tattoo textures from using this HD-UV template.
Contents in this folder
1) Scripts (Full Permissions)
1.1) Simple Tattoo Applier Script (main script)
This is a main script that sends UUIDs of your textures to the tattoo layers on Aesthetic body. Before setting your item for sale, you must change this script's permissions to "NO-MODIFY, NO-TRANSFER" to protect your UUIDs, otherwise, your texture UUID might possibly be stolen.
1.2) About Button Script (optional)
This script is for making an ABOUT button on Applier HUD to show your store or product information. You have to change the information in the script before putting it into HUD.
1.3) Default Button Script (optional)
This script is for sending the blank (invisible) texture to the tattoo layers on Aesthetic body in order to remove/clear the tattoo textures from the body.
2) Sample Tattoo Applier HUD
This is just a sample applier HUD that we made as a guide only. You can try using this HUD to add the tattoo to your Aesthetic body. This sample applier HUD is not transaferable because we want to encourage you to create your own HUD object so that the creator of the HUD will be your name.
3) Tattoo HUD interface
This is a sample HUD template we gave you as a guide. You may use and edit it, add your product image, or you can design your own HUD interface.
4) Tattoo HD-UV templates
Save these tattoo HD-UV templates (face, chest, back, left arm, right arm, left hand, right hand, pelvis, left leg, right leg, left foot, right foot and nails) into your computer and use them as a guideline layers to make tattoo textures. These tattoo HD-UV templates are different than SL-UV templates. That means you cannot use SL-UV tattoo textures to make tattoo appliers for Aesthetic body.
TIP:
If you want your tattoo on the Aesthetic body to be able to modify color by using [HUD] color, we suggest you make tattoo texture in white, NOT black. If you make tattoo texture in black from the beginning, when you use [HUD] color to tint, you will see nothing happens, black is still black. It is just like you paint any colors on the black, you will still see it black. Therefore, white tattoo texture is the best default color for using [HUD] color to tint. Or you may make 2 color options; black and white tattoos.
5) AESTHETIC Compatible tag texture
Put this tag on your product image or ad to say that it is compatible with Aesthetic body.
How to create Tattoo Applier HUD
1) Upload your tattoo texture into Second Life with alpha channel in TGA format / 32 bit or PNG. Right click at your texture and choose "Copy Asset UUID".
2) Open the Simple Tattoo Applier script and paste your texture UUID in the body parts (where the tattoo will appear) command lines.
(You can refer the body part names from Tattoo UV templates)
Example #1: Assume if UUID of your chest tattoo texture is 00000000-0000-0000-0000-000000000000. Put the UUID at torso front side line behind the chest tattoo command only and delete other unused body parts command lines as following;
llSay(channel, "chesttattoo|00000000-0000-0000-0000-000000000000");
Example #2: If you want to make tattoo on your back and left arm. Assume if UUID of your back tattoo texture is 11111111-1111-1111-1111-111111111111, put the UUID at torso back side line behind the back tattoo command. And if UUID of your left arm tattoo texture is 22222222-2222-2222-2222-222222222222, then put the UUID behind the left arm tattoo command line, and delete other unused body parts command lines as following;
llSay(channel, "backtattoo|11111111-1111-1111-1111-111111111111");
llSay(channel, "larmtattoo|22222222-2222-2222-2222-222222222222");
TIP:
You can wear multiple tattoos by separating applier HUDs. Each applier HUD must contain only one UUID for one specific body part command and delete other unused body parts command lines. However, each applier HUD has to be for different body part, you cannot wear multiple tattoos on the same body part area.
You may read the instructions inside the Simple Tattoo Applier script for more details.
After done putting UUID, do not forget to set the script permission to "NO-MODIFY, NO-TRANSFER" and click save.
3) Build a prim object for making HUD and drag the modified Simple Tattoo Applier script into the root prim of your HUD.
4) Test it by clicking at your HUD to send the tattoo to the body.
5) If it works fine, set the permission of the HUD to "NO-MODIFY, NO-TRANSFER". (This is to protect your own texture UUIDs)
6) You can make "DEFAULT" and "ABOUT" buttons using the default and about scripts provided in the developer kit.
7) You can either design your own HUD interface if you want, or use the Tattoo HUD interface texture provided in the developer kit.
8) Now you are ready to sell your Tattoo Applier HUD. However, to make sure people know that it works only with Aesthetic body, you need to put the AESTHETIC Compatible tag in your product images/ads and put a keyword "Niramyth Aesthetic" on Marketplace, so people can search for your product.


(NIRAMYTH) - AESTHETIC - Developer Kit / HD-Skin
Introduction
This HD-Skin Developer Kit is for Aesthetic users who want to make skin for personal use and/or for sale. This developer kit requires basic knowledges of texture making and modifying skills. Please read TERMS OF USE carefully before you use the developer kits.
You can find a personal use kit in the Aesthetic package, but if you want to make skin appliers for sale then you are required to submit an online application.
>> HD-Skin Developer Kit Application
NOTE:
You CANNOT use SL-UV skin textures on Aesthetic body because SL has a different UV template than Aesthetic UV template or as so called "HD-Skin Template"
What is HD-UV template ?
HD-Skin is a custom UV template, and specifically designed to be used with Aesthetic Advanced Mesh Body only.
HD-Skin template allows skin creators to make bigger size textures for full body that have much higher resolution and detailed (5 times / 15:3 skin maps) than Second Life UV template.
(See the image below for the template comparison)
HD-Skin Developer Kits
1) Mesh Head Applier Developer Kit (available in Personal Use and Commercial Use Kit)
This kit is for making custom facial and hairbase designs for Aesthetic mesh head.
Contents in this kit;
- HD-Skin skin of Aesthetic mesh heads (face, hair base, scalp and ears skin textures) for Enzo, Smith, Raoh, Jonny, Damond to match with Aesthetic body skin tone you have which leave blank at the center of face for your own facial design.
See a sample below;
- A sample hair for your own hairbase custom styles and color customization
- Script and a Config notecard for making skin applier HUD
2) Full Body HD-Skin Applier Developer Kit (available in Personal Use and Commercial Use Kit)
This kit is for making custom full body HD-skin skin textures and appliers for Aesthetic mesh body.
Contents in this kit;
- Full body UV templates with color guidelines at the connected edge
- Full body shadow maps
- Sample original skins (medium and pale) which leave blank space at the center of the templates for your own skin designs (in commercial use kit only)
- Script and a Config notecard for making skin applier HUD
How to create Skin Applier HUD
For personal use: If you don't want to create a new HUD, you can skip to 3) and use a "Sample Applier HUD" in the kit instead. You can make copies of "Sample Applier HUD" and rename it for personal use.
1) Rez a Script Box and copy the SkinInstaller_version script to your inventory, and set its permission as "NO-MODIFY, NO-TRANSFER" (Only Copyable).
2) Create your own HUD by making at least 2 prim objects (in the land that allowed creating object and scripting available) then link them together. First prim is a root prim, and another one is a child prim.
2.1) The root prim will contain the scrip. You can rename the root prim to anything that you want for your brand such as "BRAND: HD-SKIN for AESTHETIC - Light Brown". You will not be able to change its name after install a script.
2.2) The child prim must be named "SKININSTALL" because it will be a button the we press to install textures to the body. You can make multiple buttons (child prims) if you want.
2.3) Set permission of this HUD to "NO-MODIFY,NO-TRANSFER" (Only Copyable).
*** You can see how we built the HUD by inspect our "HD SKIN INSTALLER HUD". We have more buttons for changing eyebrows (limited to 16), facial hair styles (limited to 16), and chest hair. You don't have to make those extra buttons. Only one install button is enough.
3) Upload your skin textures into Second Life. Right click at your texture and choose "Copy Asset UUID".
**Only for hair base texture, you have to save file as TGA or PNG with alpha channel because hair base is a transparent layer covering on mesh head.
TIP:
If you want to make an applier only for face on Aesthetic mesh head, you only put UUID of your face texture at the face and eyebrows commands, and delete other unused body part commands.
4) Open the "Skin.Config" notecard. Read the information inside and put your texture UUIDs as in the sample. After put all UUIDs in the notecard, click save. DO NOT change the name of this notecard.
5) Drag and put the notecard (that contains your UUIDs) into the content of your HUD. If you make multiple buttons (child prims), each button must contain a script and a config notecard.
6) Again, make sure you have set permission of the script "SkinInstaller_version" to "NO-MODIFY, NO-TRANSFER" (Only Copyable). After done checking, drag the script to the content of the HUD.
7) Wait until it is finished loading the data, the notecard will be deleted and you will get a message telling that it is finished.
DO NOT reset the script or change the permission of the script or the HUD after this step, otherwise your UUID data will be lost.
8) Check into the HUD's content and make sure there is only script left and there is no notecard in there.
9) Take the HUD to your inventory. Right click HUD object and attach to HUD at the spot you want. Now you can try to click apply button on the HUD to check if it works.


(NIRAMYTH) - AESTHETIC - Mesh Head Developer Kit
Introduction
This Mesh Head Developer Kit is only for mesh head creators who want to use the kit for neck/head sizing and fitting to be compatible for Aesthetic Advanced Mesh Body.
This developer kit requires knowledges and experiences of fitted mesh creating and rigging skills.
You are required to submit an online application.
>> Mesh Head Developer Kit Application
Contents in Mesh Head Developer Kit
- Dummy model (from head to upper chest) in Maya 2015, DAE, FBX, BLEND and OBJ
- Headblenders XS, S, M, L, XL sizes in DAE and FBX
- Base skins (Enzo, Smith, Raoh, Jonny, Damond) of the head and headblender as a guide to match with Aesthetic body skin tones.
- Aesthetic Compatible Tag (PNG)
OMEGA System Compatible
You can also use OMEGA Applier with our AESTHETIC Advanced Mesh Body. (For Clothing Layers only ! )
You can purchase OMEGA Kit that designed for AESTHETIC here > OMEGA System Kit - [NIRAMYTH]
For more information and the instructions, please visit > OMEGA System Kit for [Niramyth] Instructions
